Do You Need a Vacuum Pump for a Mini-Split? Quick-Connect vs Flare Installs
By Wendell Asaro · Updated October 2026
Independent editorial guide. We never accept payment for coverage, though we may earn a commission if you purchase through our links.
Quick Take
Only if your mini-split uses flare fittings. Pre-charged quick-connect systems (the MrCool DIY 5th Gen, the MrCool Easy Pro and Klimaire's DIY 5th Gen) ship the line set sealed and charged, and each maker's product page says setup needs no vacuuming. The flare units we checked are a different job: the Pioneer, Senville, Della and Cooper & Hunter manuals call for evacuating the lines with a vacuum pump, Gree's Sapphire manual lists one among its installation tools, and four of those manuals name a 500-micron target, which takes a micron gauge to read.
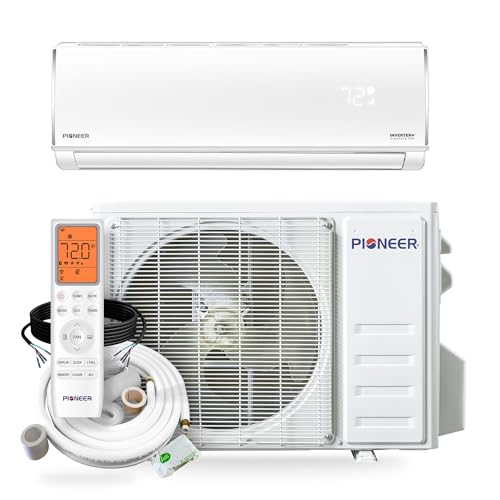
"Pre-charged" on a listing doesn't settle it, because on a flare unit only the outdoor unit holds refrigerant. If you'll hire a tech for the evacuation, or you own the tools and hold an EPA Section 608 card, a flare unit like the Pioneer Diamante Pro costs far less. If you won't, buy the MrCool DIY 5th Gen and leave the pump off your shopping list.
The no-pump unit we'd buy, the flare unit we'd buy if you're hiring the startup, and the three tools a flare install needs are below. See picks ↓

Every mini-split in this guide leaves the factory with refrigerant in the outdoor unit. What decides whether you need a vacuum pump is the line set between the two halves. On a flare system those copper lines arrive empty and full of air, so once they're connected, the manual has you pull the air and moisture out before the refrigerant goes in. On a quick-connect system the lines are sealed and charged at the factory too, and the couplers join them without that step.
For most people asking this question, we'd buy the MRCOOL DIY 5th Gen 12,000 BTU 115V mini-split. It needs no pump, its warranty is written for owner installs, and it covers the pre-charged line set as a part. We'd talk you out of the quick-connect premium in one case: you were going to pay a tech for a startup anyway. Then a flare unit and a hired evacuation cost less in total at the prices we checked, as long as you can find someone who'll do it.
Pre-charged is not the same as no vacuum
Listings blur this constantly. Della's FAQ says plainly that its condenser and lines "are not pre-vacuumed" and that you'll need to vacuum the system during installation, and people confuse pre-charged with DIY all the time. On a flare unit the factory charge sits in the outdoor unit, sized for a set length of line, and the lines themselves have to be evacuated before the valves are opened. A quick-connect line set carries its own charge, and the fittings join without opening the system to air.
So the first thing to check on any listing is the fittings, not the word "pre-charged." Quick Connect (MrCool) or E-Z Kuick Connect (Klimaire) means no pump. Flare nuts, pre-flared copper, or a 16 ft line set with brass flare nuts means you're evacuating. If a seller can't tell you which one you're getting, assume flare.
What each manufacturer says
From each maker's own manual, product page or warranty. Current-generation models only.
Unit | Fittings, refrigerant | What the maker says |
|---|---|---|
MrCool DIY 5th Gen | Quick-connect, R-454B | MRCOOL's product description (not the install manual) says the 25 ft pre-charged Quick Connect line set means setup "doesn't require vacuuming," and its DIY page calls the line "designed for full homeowner installation." The install manual adds a catch: "The line sets are designed to only be installed once," and installing them more than once, or disconnecting and reconnecting at the outdoor unit, voids the warranty. |
MrCool Easy Pro | Quick-connect, R-454B | An 11.5 ft pre-charged Quick Connect line set, "eliminating vacuum pumps and refrigerant handling" per MRCOOL's product description. Its manual says "The warranty is only valid if the lines are installed correctly as described in the instructions," and its warranty's parts definition excludes the line sets. |
Klimaire DIY 5th Gen | Quick-connect, R-454B | The product page promises "no vacuuming, gauges, or refrigerant handling," and the 2026 manual says DIY installation is permitted. The same manual also says only technicians trained to handle A2L refrigerants may install it, and while the current DIY warranty allows owner installs, its claim procedure asks for an installation invoice from a licensed HVAC technician. Get Klimaire's position on your install in writing. |
Pioneer Diamante Pro | Flare, R-454B | The piping arrives pre-flared, and the manual calls for a nitrogen-assisted evacuation ending at "a reading of 500 Microns (0.5 Torr)," held for at least 4 hours "to ensure a moisture-free system," using "a vacuum pump and manifold gauge." It says "Qualified and well-trained personnel must complete the evacuation of the refrigerant circuit." |
Senville Leto | Flare, R-454B | The manual says to evacuate the indoor unit and pipes with a vacuum pump and names a vacuum pump and manifold gauge. It calls for evacuating at least 15 minutes or until a micron gauge reads 500 microns, and its A2L requirements add no rise above 1500 microns in 10 minutes once the pump is isolated. Senville's product FAQ answers "Can I install the system myself?" with "No." |
Della Serena | Flare, R-32 | The manual says a mini-split "absolutely needs vacuum pumping" and calls for running the pump until a micron gauge reads 500 microns or lower, with a manifold-gauge method as the alternative. Della's newer manual for the Serena CloudAir (MX) models adds that A2L systems need an A2L-rated vacuum pump, or the vacuuming must be done outdoors; that line isn't in the earlier Serena manual. |
Cooper & Hunter MIA | Flare, R-454B | Evacuate with a vacuum pump and manifold gauge, running the pump "for at least 15 minutes, or until the vacuum measured using micron gauge to 500 microns." |
Gree Livo and Sapphire | Flare, R-32 | Flared line connections, a vacuum pump in the Sapphire manual's list of installation tools, and manuals for both saying installation "must be performed by qualified professionals." |
We list what the manuals require so you know what the job involves and what to ask an installer, not as steps to follow. Each manual's own procedure governs the install.
Where a manual lets the evacuation end on time or on a manifold-gauge reading instead of a micron reading (Cooper & Hunter, Senville, Della), we'd still want a micron gauge on the job, yours or the tech's. A timed pull tells you the pump ran; it doesn't tell you the system is dry and tight. Mitsubishi's manual for its MSZ-FX line, which is sold through contractors, is blunter: "System manifold gauges must not be used to measure vacuum. A micron gauge must be used at all times."
Why the evacuation matters
The manuals give the reason in their own words. Pioneer, Senville and Cooper & Hunter all describe the job as "removing any non-condensable gas and moisture from the system," Pioneer's hold is there "to ensure a moisture-free system," and Della's manual says vacuuming keeps the refrigerant from reacting with moisture from the air and damaging the machine's internal parts.
The owner record on what happens when it's skipped is thinner than the warnings suggest, and we'd rather tell you that than inflate it. Damage from moisture is slow, so it rarely shows up as a clean cause and effect. One owner blames the death of the first unit they paid an installer for, after a year, on the installer not pulling a vacuum and watching it longer than 30 minutes; that's their diagnosis, not a lab's. Two botched Senville installs, one where the refrigerant was released without a full vacuum (the unit still heated and cooled) and one where the hold check was skipped and a leak turned up, both left their owners asking whether to pay a pro to recover the charge and redo it. On the other side, some people claim they've skipped or shortcut the vacuum on splits they installed with no trouble, one of them for six years. The usual prediction for a wet system, sometimes relayed from pros, is a failed compressor, anywhere from a year to about five years in.
The warranty settles it even where owner experience doesn't. Pioneer's warranty, which doesn't require a licensed installer, excludes "Damages or repairs arising as a result of a faulty installation" and damage from "moisture, air, dust, sand, dirt, etc., that have been allowed into the system by improper handling of system parts and components during installation." It also excludes refrigerant losses "occurring at any time afterward." Senville, Cooper & Hunter and Gree go further and tie the whole warranty to a licensed installer. Whoever evacuates a flare unit, you or a tech, keep a record of the final micron reading: a photo of the gauge, or the number written on the invoice.
The tools a flare install requires
The manuals name the core kit, and it isn't the same as the tools for the rest of the install. This is a shopping list, not a procedure. Pioneer, Senville and Cooper & Hunter name a vacuum pump and a manifold gauge. A micron gauge is what reads the 500-micron targets those manuals set, and Mitsubishi requires one outright. Pioneer's evacuation uses nitrogen breaks, which means a nitrogen cylinder and regulator. Mitsubishi's MSZ-FX tool list includes a flare tool "for R410A/R454B"; Pioneer's lines arrive pre-flared, and Della's manual says only a qualified HVAC technician should alter the pipe length. Our own addition, not a manual's: a flare-nut torque wrench, since every flare joint is one more place for a leak.
What owners say the kit costs, as they reported it: one DIYer who installed a flare system (brand not named) tallied $671.07 for the vacuum and test gear, including a sparkless two-stage pump, an R-454B manifold, a nitrogen regulator and tank and a digital vacuum probe, plus about $25 to fill the nitrogen tank, and said that didn't count the tube bender, torque wrench and hole saw any install needs. At the other end, one owner got through an install for less than $200 in tools. Others put the tools at around $800. The spread comes down to the pump, the gauge and whether you do a nitrogen pressure test. If the manual calls for a 4-hour hold, as Pioneer's does, that's easier on a pump you own.
R-454B and R-32: what changes for the tools
Every current unit in this guide runs on R-454B or R-32, and EPA's refrigerant tables class both as A2L refrigerants. That changes what you buy. Della's Serena CloudAir (MX) manual says "When evacuating mini-split system with A2L rated refrigerant, an A2L rated vacuum pump must be used. If an A2L rated pump is not available, vacuuming must be done outdoor only." Mitsubishi's tool list specifies a flare tool, gauge manifold and vacuum pump "for R410A/R454B." An older pump or gauge set bought for R-410A work may not be rated for either.
So check the listing before you buy. The pump we link describes itself as "sparkless, suitable for A2L new refrigerants such as R32, R1234yf, R454B," and the manifold set we link lists itself as "compatible with R22, R410A, R454B, and R32." The A2L label also reaches the quick-connect side: Klimaire's DIY manual and the MrCool Easy Pro manual both set minimum mounting and room heights for the indoor unit (at least 6.0 ft above the floor in a room at least 7.3 ft tall), and Klimaire's adds a minimum room area table you should check before you pick the wall.
Hiring out the evacuation instead
Paying a tech for just the refrigerant side is the cheapest way into a flare unit, when it works. Two Pioneer owners paid about $250 for it: a retired HVAC specialist started up two units at $250 apiece, and a local company vacuumed the lines and released the refrigerant on a dual-zone unit for about $250. Handing over more of the job costs more; $1,500 bought one owner a tech who ran the lines, mounted the unit and wired it, after the owner did the conduit, pad and line set covers.
The hard part is finding someone. Many HVAC companies won't install customer-supplied equipment. A Senville shopper with an evacuation pump already bought found local shops wouldn't work on systems they don't sell, and ended up going a different route because Senville wouldn't warranty an owner install. The DIYer with the $671.07 tool bill posted locally for someone to do the nitrogen test and vacuum and got no replies. Call around before you order a flare unit, and ask specifically for an evacuation and startup on customer-supplied equipment, with the micron reading written on the invoice. In one owner's experience, a one-person shop is your best bet.
The legal side: EPA Section 608
EPA's Q&A on its refrigerant sales restriction says "Any person servicing, installing or disposing of stationary appliances (except the disposal of small appliances) must be a section 608 certified technician," and the federal definition of a technician lists attaching or detaching hoses and gauges and adding or removing refrigerant among the activities that count, with owners named among the people who can be technicians. A flare evacuation attaches hoses and gauges to the refrigerant circuit, which is why we'd hand that step to a certified tech if you don't hold the card.
The quick-connect side is less settled. EPA has stayed its sales restriction as it applies to pre-charged split systems since 1995, so anyone can buy either kind of unit, and it hasn't published a plain statement on whether connecting a quick-connect line set counts as technician work. We won't pretend to settle it. One thing is settled: only Section 608 certified technicians can buy refrigerant for stationary systems, so a leak on either kind of system, or a flare run longer than the factory charge covers, puts you back in a tech's hands. Check your local permit rules too, and put the wiring in a licensed electrician's hands.
Which route we would take
Run the numbers both ways. When we checked, the Pioneer Diamante Pro 12K 115V cost about half what the MrCool DIY 12K did. Add the $671.07 tool bill that one DIYer reported and the Pioneer still came in under the MrCool; add a $250 hired startup instead and it was far under. On heat, the Pioneer makes 9,000 BTU/h at 5°F to the MrCool's 8,400 per NEEP. On paper the flare unit wins.
It loses when the evacuation doesn't happen properly or doesn't happen at all. If nobody local will do the startup and you don't hold a 608 card, the cheap unit sits in its box or gets installed without the step its own warranty depends on. That's the reader we'd send to the MrCool: no pump, no micron gauge, a warranty that covers your own install, and one rule to respect, connect each line once. If you can line up a tech first, buy the Pioneer and keep the difference. The full comparison is in MrCool vs Pioneer, and our best DIY mini-split guide covers the other quick-connect options, including the Klimaire.
The picks
Products we recommend for this guide.

MRCOOL DIY 5th Gen 12,000 BTU 115V Mini-Split
The no-pump answer: a 25 ft pre-charged Quick Connect line set MRCOOL says needs no vacuuming, and a 5-year parts, 7-year compressor warranty that allows owner installs and covers the line sets. Connect each line only once.
Read our full review: we scored it 6.9/10


What owners say
Real owner reports from the threads and editorial sources we drew on for this guide.
“Now it’s a matter of finding someone that can evacuate the system for warranty reasons as around here they don’t want to touch systems they don’t sell.”
“Find a private ac company. A one man show would be happy to just pop by and do pressure test and vacuum. I installed mine for less than $200 in tools.”
“I paid an HVAC person to do The first one and the machine crapped out after a year because he didn't pull a vacuum and monitor it longer than 30 minutes. After I couldn't get anybody to come and even look at it, I figured I'd just teach myself and I installed 3 with no issues.”
